How to insulate the roof of a house. We correctly insulate the roof of the house with our own hands, a detailed guide
By insulating only the outer walls of the house, it is impossible to achieve a good heat-saving result. Due to the fact that the walls of the foundation are deepened into the cold soil, concrete becomes an excellent conductor of heat - it cools quickly in winter. And it is through him that cold and moisture will penetrate into the room.
Therefore, the most important stage in the construction of any building, country house or industrial facility is the decking and further insulation of the roof. The air inside the room is always warmer than the outside, with a lower density, therefore, according to the laws of physics, it rises up and tends to leave the building.
Roof insulation will ensure the comfort of living in the house, creating optimal temperature and saving energy costs for heating. Therefore, information on how to properly insulate the roof is in the first place among all measures for thermal insulation of a building.
To determine the need, it is worth observing the house in winter time: if there is snow on the roof, then the heat is well retained in the room, and if it melts, then this indicates the loss of warm air.
What are the goals pursued?
By insulating a house from above, you can achieve one of two goals. The first goal is to create the most favorable temperature regime only inside living rooms without active use of the attic space. At the same time, thermal insulation can be carried out only from the side of the attic or the ceiling inside the house. In this case, the attic itself remains cold, the air temperature in it will be similar to that of the outside.
At the same time, the space itself with such insulation of the roof is well ventilated and can be used to store things that are resistant to drafts and moisture. The second goal is to make an attic room or even a living room out of the attic. In this case, it is necessary to insulate not only the floor, but also the roof and gables - the main activity will be the insulation of the roof from the outside.
The design is of great importance. It is the type of roof that gives an idea of the possibility of using the attic and determines the procedure. There are several types of roof slabs.

A pitched roof is a flat surface. As a rule, they are not used for private houses, but they are often found in the architecture of city buildings, industrial facilities and utility buildings - garages, baths, sheds, etc.
A gable (pitched) roof consists of two planes located at an angle to each other. Moreover, the slopes can be of different sizes: for example, in attics, the area of one slope is much larger than the area of the second, and the angle between them is located closer to the edge of the roof.
A sloping roof has several slopes, i.e. the surface is a polyline. This design helps to increase the internal space under the roof, and the lower slopes are almost vertical, forming side walls for the room.
Working methods
Roof insulation technology is presented in the form of a "roofing pie" - a multi-layer structure consisting of external waterproofing, insulation itself and internal vapor barrier.

If necessary, a special windproof material is placed on the waterproofing, capable of passing water vapor.
When choosing a material, special attention should be paid to the supporting structures of the roof itself and the attic floor - they must withstand the load, which is enhanced by the installation of heat-insulating layers.
The “roofing pie” principle is used to insulate any type of roof according to the following scheme. The very first obstacle to wind, precipitation and cold is the roof covering - tiles, metal tiles, galvanized steel.
Under this material, it is necessary to leave a ventilation space with a thickness of up to 5 cm, and only then waterproofing in the form of polymers is fixed on a previously prepared crate. The lack of an air gap can lead to constant wetting due to condensation, which will flow down, forming icicles along the eaves of the building.

After the waterproofing layer comes the insulation itself. Usually mineral wool, expanded polystyrene are used for the roof. The insulation of the pitched structure involves fixing the heat insulator between the roof rafters, and the fastening must be tight so that there are no gaps between the sheets. Hard-to-reach areas are filled with scraps of mineral wool or covered with dry material (expanded clay, for example).
Thermal insulation is followed by a layer of vapor barrier. It can be glassine, roofing felt or foil film. The shiny surface should face the interior. The vapor barrier sheets are overlapped to each other, and the joints between them are glued with metallized tape in the vertical and horizontal directions.

The scheme assumes the presence between the vapor barrier layer and the finish - siding, clapboard - another ventilation gap, up to 2-3 cm thick. An air gap is needed to prevent the insulator and the entire roof structure from getting wet with condensate. Thus, it is quite possible to carry out the insulation yourself, knowing all the rules and observing accuracy.
Features by type of roof
When the roof is insulated with slopes, it is important to create absolutely sealed layers of waterproofing and vapor barrier. In addition, the insulation itself should be located tightly enough to the rafters so that "cold bridges" are not created at the joints - slots through which cold air can penetrate into the room, simultaneously damaging all layers of insulation and the roof itself.

First, you should inspect all the beams for rot or damage - later there will be no access to these structures, since they will be closed by insulation materials. The spacing between the wooden blocks must correspond to the size of the slabs. The latter fit into the prepared frame without a gap. All small cracks are caulked or blown out with construction foam.

How to properly insulate the roof with slabs? First of all, they should not be in contact with the floor. It is important to maintain a gap between the insulator and the roof as a constant supply of fresh air will help to cope with moisture. Secondly, they also have to be insulated from moisture with special films or foil.
Broken roof
Insulating a sloping roof is the most difficult process, since it is necessary to process several planes at once. Usually the attic in this version is used as a living room.

In addition, outrigger windows and balconies can be constructed in the lower slopes of a sloping roof, and this makes the thermal insulation procedure even more difficult.
Excluding the attic
If the roof is to be insulated, then the attic floor is supposed to be finished, since there is almost no free space here. The floor can be finished from above by rolling thermal insulation. Mineral wool, expanded clay or expanded polystyrene are used as materials for this. When thermal insulation of a flat structure is carried out with expanded clay or other dry means, a clay or cement screed is applied over the insulator, as an option - a wooden covering.

Thermal insulation can be carried out in a simple way- the floor of the roof is covered with sawdust or boiler slag, less often straw chipping is used. Usually a 5-10 cm layer is sufficient. Avoid combustible materials near the pipes. The advantage of this method is its low cost and simplicity of work.
Use of slabs
You can also insulate the attic floor with slabs. The order of implementation is as follows: a wooden formwork is made on the floor and insulator slabs are laid between the wooden beams. After that, all the cracks are blown out with polyurethane foam. If mineral wool is used, then it must be additionally protected from moisture by wrapping it in plastic wrap. In addition, it is inconvenient to move around the slabs, so they will have to be sheathed with finishing materials.

Another option for a non-residential attic is to fill the floor with penoizol. The pouring foam is sprayed onto the surface and hardens quickly to form an even layer. Insulation can insulate all cracks and hard-to-reach corners, does not burn or deteriorate from moisture, and is not attractive to rodents.
However, this method is somewhat more expensive, since it requires special equipment to work.
Stacking errors
Before insulating the roof, you should familiarize yourself with the main mistakes in work. Firstly, savings on thermal insulation material. Secondly, leaving gaps - roll insulation should be overlapped, since even small gaps will reduce the effect. Thirdly, when insulating the attic floor, the wooden beams must not be allowed to remain uncovered. In this case, they will become a "cold bridge" through which cool air enters the room.

It is necessary to build up a layer of insulation so that the beam is inside the structure. When buying slabs, it is imperative to check the integrity of the packaging - if it is broken, then there is a high probability that the cotton wool has become saturated with moisture.
Material selection
Do-it-yourself roof insulation begins with an analysis of the properties of the insulator. Particular attention should be paid to the following criteria:
- flammability;
- lightness - it is necessary to calculate whether the floors will withstand the load. The lighter the structure, the better.

Before insulating the roof, it is important to analyze such a parameter as bulk. Since some materials have a high coefficient of thermal conductivity, while others have a low one, in the first version it will be necessary to increase the thickness of the structure.
For the slabs, an additional fastener should be built, which will also take up part of the free space. The main task is to insulate the room, minimizing the living space.
For insulation of the ceiling and pitched roof, experts recommend purchasing fiber material - it has low thermal conductivity, insulates the room from noise. In addition, cotton wool insulation is easy to install, durable (up to 50 years), fireproof and does not contain harmful substances.
In practice, roof insulation in private houses is carried out when a warm attic or residential attic is planned. It is not customary to carry out thermal insulation of a cold roof, usually in this case the overlap between the attic and the living space is sewn up with insulation. Concrete flat roofs also need thermal insulation, since a huge amount of heat is lost through them. This article will tell you how to properly insulate wooden pitched roofs and concrete floors with your own hands.
Types of insulation for the roof
At the present time, few people ask the question whether it is necessary to insulate the roof of a private house at all, since the answer is obvious. If you do not want to overpay for heating, you will have to invest in thermal insulation. But how you can insulate the roof of your home, what material to choose for this purpose - this question interests many.
Indeed, the technology and the sequence of work depends on the type of insulation chosen, which we will discuss below. So, at the moment, you can carry out the insulation of a gable roof, including with your own hands, with the following materials:
- fiberglass-based mineral wool in rolls;
- mineral wool in slabs and rolls based on basalt fiber (stone wool);
- foamed polystyrene plates (polystyrene, extruded polystyrene foam, polystyrene foam);
- sprayed polyurethane foam (PPU);
- foamed polyethylene with a layer of foil (penofol, isolon).
For reference. Not so long ago, another new insulation appeared on the modern market - ecowool, made from recycled waste paper and therefore characterized by a high degree of environmental friendliness. It's just that it is very inconvenient to use ecowool for insulating a roof, especially a pitched one, and it will not be cheap at a cost.
The best insulation for the price is rolled mineral wool with fiberglass, which is offered by a well-known manufacturer - IZOVER. It protects the house from the cold quite well and can last a long time and successfully under one condition: there is no moisture, its cotton wool absorbs a lot and after that it ceases to be a heat insulator. In addition, glass wool is not suitable if a non-combustible roofing insulation is required. The temperature limit of the material is 200 ° C, upon reaching which it collapses.

The same brand IZOVER, and even URSA (URSA), produce non-combustible mineral wool from basalt fiber, suitable for insulating any pitched and soft roofs. She also loves to absorb moisture, but at the same time it perfectly resists flame. It is very popular in the field of roof insulation due to its affordable price, it is offered in rolls and slabs. The most famous manufacturer is the Polish brand ROCKWOOL.

Then there are polymer heaters, whose properties are exactly the opposite - they repel water, but are flammable. Polyfoam is cheap, but still subject to slight vapor permeability, so it is better to protect it with a vapor barrier during installation. At the same time, expanded polystyrene and polystyrene foam are practically impenetrable and do not require any protection, which simplifies the installation of roof insulation. And the main thing is that all these materials have higher thermal insulation properties than any wool.

Note. There is a lot of discussion about whether it is possible to insulate the roof with foam and other combustible polymers. If we are talking about a private house, then no one will fine for this, but you must understand that in this way you increase the fire hazard for the building as a whole.
The most expensive thing is to insulate the roof with polyurethane foam, since it is impossible to do it yourself without specialized equipment. The technology of such thermal insulation consists in applying a layer of polyurethane foam to the surface, which grows in volume from 30 to 120 times. At the same time, PU foam is the best insulation in all respects, it is not afraid of moisture and has the lowest thermal conductivity. It can also be called fireproof, because polyurethane does not immediately collapse when exposed to a flame.

Foamed polyethylene materials have good thermal insulation performance, but due to their small thickness, they can only be used together with other heaters. Thanks to the closed pores and a layer of foil, the same penofol will serve instead of the inner layer of vapor barrier.

If we consider old traditional insulation materials, such as expanded clay or sawdust with clay, then it is rather difficult to insulate inclined roof slopes with their help. They are usually used for thermal insulation of a cold roof floor. Expanded clay or clay fill the grooves between the floor logs in the attic, having previously spread the film.
Insulation calculation
There is nothing difficult in calculating the amount of heat-insulating material, knowing the insulated surface area of a shed, flat or gable roof. In addition, the size of the insulation is most often tied to the standard spacing between the roof rafters (600, 1000 mm). Another thing is to correctly determine its thickness, for which you need to refer to the regulatory framework.
For each region, regulatory documents establish the minimum value of the heat transfer resistance (R) of roof structures. That is, the thickness of the insulation must be such that it provides this value, no less. The table below shows the indicators of the minimum thermal resistance for some cities of the Russian Federation:

If we take Moscow and the region, then for this region the value of R should be no less than 4.67 m2 · ° C / W. Having adopted the most popular insulation - URSA mineral wool (URSA), we learn from publicly available sources its thermal conductivity coefficient λ, equal to 0.045 W / m2 · ° C. After that, we calculate the thickness of the thermal insulation layer:
In this formula:
- δ is the required thickness in meters;
- R - standard thermal resistance, equal to 4.67 m2 · ° C / W;
- λ is the coefficient of thermal conductivity of cotton wool, taken as 0.045 W / m2 · ° C.
Hence δ = 4.67 x 0.045 = 0.21 m = 210 mm. Since it is considered the right decision to take the thickness of the roof insulation with a margin, and not at a minimum, the final calculation result is 250 mm. For convenience, below is a diagram showing the thermal conductivity of various materials:

By the way, this calculation method does not take into account the resistance of the roof covering due to its relatively low value. Any metal roof, for example, metal roofing, does not retain heat at all. Slate, ceramic and bituminous tiles behave a little better, but in comparison with the required layer of insulation, their resistance to heat loss is negligible.

Advice. When choosing a heat-insulating material, be sure to pay attention to its density, the degree of thermal conductivity depends on it. The greater the density of the insulation, the stronger the material, but also the higher the ability to transmit heat. This will ultimately affect the design insulation thickness.
Roof insulation technology
It should be noted here that it is most convenient to carry out the correct insulation of the pitched roof from the inside during construction. But it is better to insulate a concrete slab from the outside, laying a layer of insulation under a soft roof, than then to hem the ceiling from the inside. The scheme of the thermal insulation "pie" for this option looks like this:

First, a waterproofing membrane is laid on the concrete base, and on top of it is a plate insulation of sufficient density (for foam plastic it is 35 kg / m3, mineral wool - at least 125 kg / m3). Then a cement-sand screed with a thickness of 50 mm (minimum - 30 mm) is arranged on top. The last stage is the laying of roofing material, as a rule, roofing material. The technology is described in more detail in the video:
The composition of the “pie” of insulation for gable roofs of conventional and broken structures depends on the material used. But 2 rules remain the same for all options:
- a diffusion membrane must be installed under the roof covering. It does not allow water to pass through, but allows steam to escape;
- there must be a ventilation gap between any roof covering and the membrane through which air circulates from the overhang to the ridge, as shown in the diagram:

Important. If there is no diffusion membrane on the old cold roof, then to insulate it, you will have to remove the metal or slate cover and lay the waterproofing outside. It is not allowed to pull the membrane over the rafters from the inside, since it will not be able to drain water outside.
Mineral wool insulation
So, before installing metal tiles or slate, a diffusion membrane should be laid, ensuring a hermetic fastening with the help of counter-lattice bars. The canvases must be laid horizontally, starting from the bottom, in order to provide for the flow of water along them, the overlap is at least 10 cm, as in the photo:

The next step is internal insulation, for which you need to cut the mineral wool and insert it between the rafters. It is necessary that the size of the insulation in width be a couple of centimeters larger than the interval between the rafters. This will allow you to insert it tightly, the cotton will not fall out.

If the width of the rafters allows you to insert cotton of the calculated thickness, then a layer of film for vapor barrier goes further, which is nailed to the rafters with battens for the installation of interior decoration. The width of the plank is 4-5 cm, due to which an air gap will appear between the finish and the vapor barrier. A diagram of the entire "pie" for roof insulation is shown in the figure:

When the width of the rafter board is not enough, then the whole unit becomes somewhat more complicated. You will have to lay the cotton wool in the second layer, for which you need to horizontally nail the bars of the required width to the rafters. Insulation is laid between them in the same way, and then - according to the previous algorithm.

Note. To insulate a pitched roof with mineral wool, the composition of the "pie" remains the same, only the work will have to be performed while standing on the scaffold, as in the case of thermal insulation of the ceiling.

Foam insulation
When insulating a roof with polystyrene plates, it is recommended to follow the same sequence of actions as when insulating with basalt wool. One clarification: the slabs need to be cut not by 2 cm more than the interval, but by a couple of millimeters, since the material is quite dense and durable. It also does not hurt to protect the foam from the inside with a vapor barrier, since this insulation is destroyed from prolonged exposure to moisture.

Advice. Instead of a vapor barrier, a layer of foamed foam can be laid on top of the foam. The canvases are laid end-to-end with gluing with aluminum tape.
Another thing is extruded polystyrene foam or polystyrene foam, which repel water vapor. It is not necessary to cover them with a film, and the dense structure allows you to fix the plates with self-tapping screws. When the width of the rafters is not enough, the second layer of foam is attached to them exactly as shown in detail in the video:
Conclusion
The complexity and duration of the roof insulation process largely depends on the thermal insulation and physical properties of the insulation. The eternal rule works: the cheap material must be laid in 2 layers and protected from vapors, which means that more labor will have to be invested. Expensive heaters are attached much more conveniently and faster. Insulation with polyurethane foam will deliver the least worries, which is very important for a broken roof structure, but it will also require a lot of money.
Roof insulation plays a huge role in the completion construction works... Having built a house or a summer cottage, you have to think about how to make the building as comfortable, warm and cozy as possible. Regardless of whether there will be a living space in the attic or not, it is necessary to insulate the roof in any case. This will reduce heat losses and contribute to energy conservation.
Do-it-yourself roof insulation
Roof insulation work does not have to be done with the help of a specialist, everything can be done with your own hands. The whole process should start with the selection of the necessary materials and the creation of a plan and work scheme. Any roof consists of an outer (roof) and an inner (ceiling and rafter frame) parts.
All insulation work is carried out only after checking these components, and, if necessary, they are repaired. Then they remove excess moisture and get rid of dampness and mold.

To prevent bacterial damage to wooden structures, the inner surface of the roof is treated with an antiseptic, and to protect metal structures from rust, such surfaces are treated with anti-corrosion compounds.
Insulation materials
Modern manufacturers offer a wide range of materials for roof insulation. The most popular are:
- Mineral wool (fiberglass, stone slabs);
- Extruded polystyrene foam;
- Polyurethane foam.
The material to dwell on determines the characteristics of the roof. For example, pitched roofs are preferable to insulate with fiberglass.
Fiberglass
This material has excellent heat-insulating and sound-insulating properties. Also, fiberglass is durable, the term of use reaches fifty years, it is fire resistant and vapor permeable. And, of course, the price, the purchase of such material is quite an inexpensive pleasure.
The most popular materials for use are mineral wool and expanded polystyrene. This popularity is due to the ease with which they are manipulated.
Mineral wool
Depending on the initial type of material (stone or glass), mineral wool is divided into two types:
- the fibrous structure of the material formed by melting fine particles of rock, as well as various slags and mixtures obtained in industrial metallurgy, make the product truly unique.
The material is not afraid of high temperatures, and is also sufficiently resistant to aggressive chemicals. 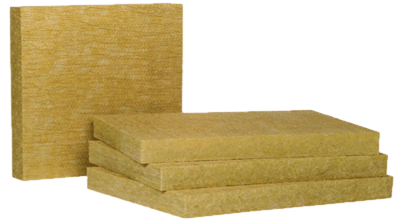
Glass wool- heat-insulating material with air fibers, which are especially durable. The product is obtained by melting ordinary glass. Like stone wool, the insulation is highly resistant to chemical products and does not burn.
The thermal conductivity of glass wool is 0.05 W / m ° C at 25 ° C. During operation, glass wool practically does not shrink, and its fibrous structure, even after a long period of time, remains the same elastic and elastic. 
Mineral wool has excellent characteristics in the following indicators:
- Low thermal conductivity;
- Excellent sound insulation;
- Fire resistance, which is very important for the roof material;
- High environmental friendliness and durability.
Styrofoam and penoplex
Both heaters have a fairly low specific gravity, so their use does not make the roof heavier, and also does not provide for the additional use of material that insulates against steam, since neither the foam nor does it absorb moisture.
Polyurethane foam
One of the modern materials is.
It does not need to be glued or nailed to the surface, it is applied by spraying onto it. This material has excellent adhesion to surfaces and the result is a durable, seamless construction that is neither cold nor moisture permeable.

Ceiling insulation in a house with a cold roof
When the materials are selected, you can go directly to the process of laying the material. The peculiarity of this process depends on the roof structure and the future use of the attic.
If the use of the attic as a living space is not provided, then the insulating material is laid on the floor of the attic between the logs, and not between the roof rafters. A membrane is laid on top to improve vapor permeability, then it can be covered with any floor covering. 
To exclude the formation of the appearance of "cold bridges", the insulation should adhere to the logs as tightly as possible. To do this, when cutting insulation, its size must be done on 1-2 cm... wider than the distance between the lags.
Insulation of the attic from the inside
If it is decided to equip the attic for a living space, you should insulate the roof with your own hands using a different technology:
- Initially, a waterproofing layer is laid to protect the insulating material from getting wet. To do this, the waterproofing membrane is laid on top of the lathing and fixed with counter-lattice bars;
- Then the insulation itself is laid between the rafters. In order to avoid the formation of gaps, during installation, you should adhere to the same technology as when insulating the ceiling - the insulation should be wider by 1-2 cm.
- As a vapor-permeable layer, a vapor barrier film is attached over the insulation, at the joints, it is laid with an overlap;
- The film is fixed on top with bars, which will serve as the basis for the finishing.

How and what to insulate a flat roof
Thermal insulation of a flat roof follows a slightly different scheme. The beginning of work is the determination of the purpose of the premises. The alleged use of the attic as a gym or some other place for entertainment suggests that the roof must be really strong in order to withstand serious loads.
- To form a slight slope of the roof, a cement screed is made on a reinforced concrete slab;
- Then, as in the case of a pitched roof, a waterproofing layer is laid;
- Upon completion of these works, everything is covered from above with a layer of heat-insulating material (foam plastic, stone wool, extruded polystyrene foam, etc.), on top of which a layer of fiberglass or geotextile is laid.
- And the final stage is backfilling of pebbles or a layer of gravel and the subsequent laying of floor or paving slabs.

If there is no living space under the roof, then the vapor barrier layer and insulation are placed in the attic, and the waterproofing layer is placed under the roofing material. And in the case of complete non-use of the attic flat roof, insulation is carried out either from the inside or from the outside.
By insulating the roof, you will receive not only additional square meters, but also reliable protection for the house from severe frosts in winter and sultry heat in summer.
Insulation of the roof of a house is an important stage in the construction or overhaul of the roof. The choice of installation technology for the thermal insulation layer depends on the configuration of the roof, the type of insulation and the requirements for the room located directly under the roof.
The need for roof insulation
How to insulate the roof in order to significantly reduce the heat loss at home? First of all, you need to choose the right materials for insulation and adhere to the installation technology exactly. A high-quality insulated roof increases the thermal efficiency of the house by 15%, and allows you to turn the attic into a room suitable for year-round living.
The highest requirements are imposed on the roof insulation of the residential attic of houses located in areas with cold winters. The roofing cake of summer lofts or exploited lofts may include a thinner layer of thermal insulation. The roof, under which the unexploited attic is located, is usually not insulated - the thermal insulation is mounted on the floor of the attic or the ceiling of living quarters. The non-insulated non-residential attic is well ventilated, which prevents decay of the wooden elements of the roof frame.
When installing pitched and flat roofs, different methods of roof insulation are used.
Thermal insulation of a flat roof
How to make an insulated roof when installing a flat roof? It should be noted that a flat roof can be insulated both from the outside and from the inside.
The flat roof cake contains:
- vapor barrier;
- heat insulator;
- waterproofing layer made of roll material;
- bulk layer (drainage + cement-sand mixture).
It is most convenient to carry out external insulation using mineral basalt wool. You can also use expanded polystyrene and other rigid insulation. It should be borne in mind that polymer insulation cannot be used when installing roofing with high fire safety requirements.

Insulation of a pitched roof
The roofing pie of the pitched roof is made with insulation along the rafters. It is important to figure out how to properly insulate the roof of a house in order to prevent mistakes that will ultimately lead to damage to wooden structures.
The most popular insulation in private housing construction is mineral wool. It is an easy-to-install non-combustible material that can be purchased at a low price. But the structure of the wool itself contributes to the accumulation of moisture, which causes a significant decrease in the thermal insulation properties of the material, and also over time provokes rotting of the elements of the rafter system. Thus, when creating insulation, it is important to provide for proper ventilation and steam and waterproofing of the roofing cake.

The installation of a pitched roof heat insulator is carried out from the attic side during the construction or repair of the roof. If repair work is underway, before laying the insulation, it is necessary to check the condition of the rafters - rotting elements must be replaced with new ones. It is also worth treating all wooden structures with a fire retardant composition.
Pitched roof cake includes:
- finishing roofing;
- hydro-barrier (layer of waterproofing material);
- heat insulator;
- vapor barrier;
- interior decoration (optional).
Correct roof insulation requires high-quality air exchange, for which it is necessary to create air gaps between:
- under-roof waterproofing and roofing;
- insulation and hydro-barrier;
- vapor barrier and inner lining (if provided).
Air circulation (free inflow and removal) is ensured by special air vents, one of which must be located in the eaves of the roof, and the other under the ridge. 
Pitched roof insulation materials
Roof insulation technology involves the use of various materials. The most popular heat insulators include mineral wool and glass wool (in slabs or rolls), plate polymer materials - polyurethane foam, expanded polystyrene. The principles of their installation are similar, but it is worth noting that it is much easier and more convenient to mount the slab material.

As a waterproofing, roofing material or a waterproofing membrane is usually used, which is impervious to water, but capable of removing moisture from the insulation. The vapor barrier layer can be made of:
- roofing material;
- plastic film;
- glassine;
- foil-clad materials laid with foil towards the attic space.
To create a roofing cake with high functional characteristics, it is recommended to use a special vapor barrier membrane to create a vapor barrier: it removes condensate outside the insulation and does not let steam and moisture into the roofing cake.
Stages of work on the insulation of a pitched roof
The roof insulation scheme is quite simple. The first step is to measure the distance between the rafters. Slabs of wadded insulation should be cut according to the results obtained, adding 1 centimeter. This will allow the heat insulator to be fastened between the rafters. This stage of work is greatly simplified if the roofing system was originally designed and installed with the expectation of using plate heaters of a certain width.

If there is no waterproofing between the rafters and the already installed roof covering, the water barrier must first be fixed. The membrane should envelop the rafters, it is most convenient to fasten it with a construction stapler to the rafters themselves and to the roof lathing in the openings between them. Waterproofing should be led out under an overhang at the bottom of the roof to ensure moisture drainage. It should be borne in mind that with this method of attaching the hydrobarrier, the insulation has to be installed without the necessary air gap. For this reason, it is recommended to use a super diffusion membrane as a waterproofing membrane.

If there is a waterproofing layer under the roofing, nails are stuffed onto the rafters with a step of about 10 cm. The nails should be located at a distance of 3-5 cm from the waterproofing layer. Pull a polyethylene thread or cord between the nails, knocking them to the end. This will help create an air gap between the water barrier and the insulation. If the heat insulator is planned to be fixed with a cord, and not with a crate for the inner sheathing, it is also necessary to stuff nails along the outer edge of the rafters.
 If, when deciding how to insulate the roof of the house, a cotton-slab insulation was chosen, then the prepared elements must be slightly squeezed and inserted between the rafters. When using stiffer foam boards and similar materials, it is important to accurately size them so that the boards fit snugly into the opening. It is recommended to carry out insulation in two layers. If it is necessary to mount not solid sheets into the opening, but narrower fragments, joining them along the length or width, it is necessary to ensure that the joints of the second layer do not coincide with the joints of the first. The heat insulator should not protrude beyond the plane of the rafter legs. If the rafters are not wide enough for the installation of two layers of insulation, an additional beam is nailed to them.
The heat insulator is fixed between the rafters using a stretched cord attached to pre-filled nails. Or, as an attachment, a lathing made of slats is used, intended for the installation of the interior cladding of the room. The slats are nailed to the rafters with a step of 30-40 cm. In this case, the vapor barrier is attached with a stapler to the rafters before the battens are installed: the thickness of the slats allows you to create the necessary air gap between the vapor barrier and the cladding.

When installing the vapor barrier Special attention paid to the tightness of the layer. The sheet is laid with an overlap of at least 10 cm, the joints should be glued with adhesive tape in two layers. It is necessary to carry out the installation of the vapor barrier around the chimney and at the joints with the walls as efficiently as possible. At the final stage, the cladding is installed using wood-based or gypsum plasterboards.
How to insulate the roof of a house correctly: video, insulation scheme, methods
Find out how to properly insulate the roof of a house. Look at the video on how to insulate the roof of a house using various schemes, methods and types of insulation
How to properly insulate the roof with your own hands
When building a private house, you should pay attention not only to the thermal protection of walls and floors, but also to the insulation of roof structures. The temperature and humidity conditions of the room, and even the service life of the structures, depend on the literacy of measures for insulating the roof. Work on the installation of thermal insulation material can be done by hand.
The need for insulation
From the school physics course, everyone knows that heated air rises. If there is no thermal insulation, nothing prevents him from leaving the building. Because of this phenomenon, a large amount of heat loss occurs precisely through the roof or attic floors. Lack of adequate protection against cold and warm air loss can lead to the following problems:
- lowering the temperature in the room;
- increased heating costs in winter;
- condensation on the inner surface of the roof;
- the appearance of mold or mildew on the elements of the roof;
- destruction or damage to supporting structures, and bringing the house into an emergency condition.
Insulation of roof structures, as well as insulation of walls and ceilings during the construction of multi-apartment residential buildings, must be checked by a state or private expert examination at the design stage. The thermal insulation of a private cottage is completely dependent on the future owner, no one checks its presence and a competent choice, but it does not lose its importance from this.
Warming methods
Do-it-yourself roof insulation largely depends on the roof design. There are two types of roofs: flat and pitched. Most often, flat roofs are used for the construction of multi-storey buildings, but it is possible to use it in the construction of a private cottage. Flat roofs can be constructed in two ways:


In the inversion, the order of the layers has been changed. This technology is used when arranging an exploited roof. In both cases, the following can be used as a material for insulation:
- Styrofoam;
- extruded polystyrene foam;
- mineral wool (in slabs);
- expanded clay.
The latter is quite cheap, but has lower heat-shielding characteristics. In most cases, roof insulation is used from the outside. This allows you to simplify the installation process and make protection from the cold that is competent from the point of view of heating technology.
 The scheme of laying insulation between the rafters
It is necessary to remember about the strength of the material; additional measures will also be required to protect the insulation from mechanical damage.
When building a private house, the version with a pitched roof is most often used. It allows you to equip an attic or attic and has a more attractive appearance. Roof insulation wooden house or any other can be done in several ways:
- laying material between rafters (the most common);
- laying insulation on top of the rafters;
- fastening from the bottom of the rafters.
Material selection
Insulation of the roof of a wooden house or building made of other materials is carried out using the following materials:
Rarely used materials include:
- expanded clay;
- sawdust.
 Roof insulation scheme with mineral wool
Bulk materials are used to protect from the cold outside. They have an attractive price, but they are rather difficult to install, therefore they are not widely used. Better to use more modern technology.
In general, materials for carrying out thermal protection measures must meet the requirements:
- safety, no harmful effects on humans;
- environmental friendliness;
- low weight to prevent excessive loads on the rafter system;
- resistance to creasing and sagging, sufficient strength and rigidity;
- sound insulation characteristics (especially important when using metal roofing);
- fire resistance (especially important for wood construction);
- if possible, good vapor permeability, which will provide additional ventilation of the room;
- good heat-shielding characteristics.
One of the most important characteristics of a material is its thermal conductivity. This value must be indicated by the manufacturer. The lower the value, the less insulation you need. In the absence of tightness in funds, it is better to choose materials such as mineral wool or expanded polystyrene. The values of their thermal conductivity depend on the manufacturer and are in the range of 0.03-0.04 W / (m2 * ᵒС).
Thickness calculation
It is important not only to choose the right material for insulation, but also to correctly calculate its thickness. Insufficient will lead to condensation, and excessive means an irrational waste of money. You can select the value "by eye" based on general recommendations, for example, regardless of the type of roof (pitched or flat) for insulation with mineral wool or expanded polystyrene, a layer thickness of 150-200 mm is required.
It is best to perform a full-fledged heat engineering calculation, which takes into account modern comfort requirements and allows you to find the perfect balance of cost and quality. For a specialist, performing such a calculation will not be difficult. A person who is far from construction can use examples of calculations or the Teremok program, which is freely available and is quite simple and understandable.
Competent calculations at the design stage are aimed at saving the budget and ensuring the reliability of thermal protection.
Their implementation will not take a lot of time, but will allow avoiding cost overruns during construction and additional costs for repairs during operation.
The process of insulating a flat roof
Depending on the type of roof, the insulation technology will be different. For flat roofs, the following order of layers is usually observed:
- supporting structure (most often reinforced concrete pavement);
- vapor barrier layer;
- thermal insulation material;
- cement-sand screed (reinforced for not strong materials);
- waterproofing carpet, which serves as a topcoat.
If absolutely necessary, work can be done from inside the room, but this method has several disadvantages:
- reducing the height of the room;
- dew point transfer inside the structure;
- inconvenience of work.
Heat protection for pitched roof
Before properly insulating the roof of the house, you need to figure out the order of work. The pitched roof in the overwhelming majority of cases is insulated between the rafters. Do-it-yourself roof insulation from the inside is quite a feasible task. It is important to observe the correct order of stacking materials from the bottom up:
- interior decoration;
- lower lathing;
- vapor barrier;
- rafters with insulation between them;
- waterproofing;
- wind protection;
- lathing;
- roofing material.
When the thickness of the insulation is greater than the height of the rafter legs, counter-rails are installed. It is better to use modern diffusion membranes as wind protection and waterproofing.
Competent insulation, regardless of the type of roof, requires a careful approach. To avoid problems during operation, it is necessary to choose the correct thickness of the insulation, choose a reliable manufacturer and follow the installation technology. Fulfillment of these conditions will allow the roof to last for a long time and help maintain normal temperature and humidity conditions in the building.
We insulate the roof correctly: how to avoid mistakes
Roof insulation will create warmth in the house. How and what is better to insulate the roof of a private house, we will tell you in detail in this article.
How to properly insulate the roof of a house: key points, ways
One of the main conditions affecting the comfort in a house or cottage is a warm, reliable and durable roof. It should retain heat well, protect it from moisture, and protect it from the wind. When solving such a problem as insulating the roof, one should not save on the materials used. The roof is exposed to harsh conditions, experiencing large temperature drops, the influence of precipitation, significant physical activity under the influence of the wind.
Highlights of roof insulation
Roof insulation is one of the important stages of building insulation as a whole. It is the final structure of the building that performs the main function of protecting the interior from adverse external influences. High-quality roof insulation will provide tangible savings in money during the further operation of the dwelling, reducing heating costs. After all, about 20-30% of heat loss occurs through the roof.
When deciding how to properly insulate the roof of a house, first of all, you should decide on the function of the attic room. If the attic is not planned to be a living room, then it is not necessary to carry out insulation of the roof from the inside. In this situation, only the attic floor should be well insulated in order to protect the premises of the uppermost floor from the effects of cold and heat loss. In a situation where a residential attic will be arranged in the attic, insulation of the roof from the inside is a must.

The method of performing the work also depends on the roof structure and the stage at which the insulation is carried out. The design can be pitched or flat, each of them has its own characteristics when performing work. When choosing a method, the current stage of construction should be taken into account, since it is preferable to insulate the roof of the house at the design stage. The technology for performing work is the same for both a wooden building and a brick one.
It should be noted that before insulating the roof of a wooden house, you need to carefully inspect all the details of the roof, rafters for dampness, signs of decay and various damage. Wooden structures must be treated with an antiseptic, severely damaged areas must be replaced. Elements of electrical wiring located under the roof also require careful inspection.
Materials for insulating the roof of the house
The modern market offers a huge selection of materials for insulation, the most common are fiberglass and expanded polystyrene plates, foam concrete, foamed glass, mineral wool slabs. Each type of insulation is characterized by different thermal conductivity, vapor permeability, strength and other properties. Mineral wool slabs are widely used, which differ favorably among other heaters in their quality characteristics. Their use is acceptable for most types of roofs.
Mineral wool slabs are positioned as a fire-resistant material with low thermal conductivity, good waterproofing and sound-absorbing properties. They practically do not deform during operation.
How to insulate a flat roof
Two methods are used to insulate a flat roof:
- The principle of a rolling ceiling - the insulation is laid on top;
- The principle of a false ceiling - insulation is knocked out from the inner surface of the ceiling.
Carrying out insulation work from the outside is a simpler and more convenient option. Several main points should be taken into account, among which it is necessary to highlight the ability of the supporting structure to withstand the weight of the roofing material and insulation. It is possible that the rolling ceiling insulation will be sufficient to achieve comfortable living conditions in the house. Priority execution of work using this method is more appropriate under the circumstances. Operation of the premises in the cold season will make it possible to conclude whether it is worthwhile to make insulation from the inside, based on the principle of a false ceiling.
For insulation outside the roof, which has a flat shape, it is better to use basalt mineral wool. The choice of quality materials is especially important in this stage, since it is impossible to properly insulate the roof without this component.
Phased insulation of a flat roof occurs in the following sequence:
- With the help of a vapor-proof foil, a layer is laid that serves as a vapor barrier;
- On top of the film, a layer of thermal insulation made of mineral wool slabs is arranged;
- Waterproofing is laid in the form of a roll coating of roofing material, synthetic materials;
- Laying bulk material - insulation.

Important! If the work is carried out during the period of precipitation, then it should be taken into account that the waterproofing coating must be immediately laid on the insulation, not allowing the latter to be covered with water, snow, ice. For large areas, measures must be taken to prevent precipitation from entering the roof surface.
Before starting work on roof insulation, it is necessary to thoroughly clean the surface from dust and debris. If large irregularities are present, it may need to be leveled. Thermal insulation boards are glued using special cold mastic or glue. To achieve uniformity of the coating, it is necessary to lay mineral wool with semi-overlapping joints. Laying an additional layer of slabs is allowed to improve thermal insulation, while the slabs are spaced apart, and the joints are glued with tape. The use of this technology avoids the appearance of "cold bridges".
Recently, the fire method of laying waterproofing has become widespread. A cement-sand screed with a thickness of more than three centimeters is laid on mineral wool slabs. After the concrete becomes strong, the working surface is cleaned from dirt and excess sagging. The waterproofing carpet is glued under short-term exposure to fire, without changing its protective properties. The laying of the material is carried out with an overlap of ten centimeters, which ensures the strength and tightness of the coating.
How to insulate a pitched structure
The pitched roof of houses or cottages often serves as the basis for creating an attic, which allows you to get additional square meters of living space. More stringent requirements are imposed on the insulation of the attic from the inside.
The construction of the insulated roof is called "roofing pie" due to the fact that it consists of several layers: a ventilation circuit under the cover, a waterproofing layer, another ventilation circuit (not always arranged), an insulating layer and a vapor barrier.

Waterproofing helps protect your home from moisture. When water gets under the roof, the insulation begins to lose its properties, wood structures begin to rot. In addition, the air under the insulated roof and outside can differ significantly; the temperature difference causes condensation of moisture in the air on cold structures. Condensation can also occur inside the insulation, but the arrangement of ventilation circuits allows this to be avoided. Under the influence of supply air, water vapor is removed from under the roof without condensation. A waterproofing layer covers the construction joists and is attached to them with a stapler.
The presence of a ventilation circuit on the roof is a prerequisite for its functioning. The intake of fresh air should be arranged through the gap located on the eaves of the eaves, the exhaust is carried out through a ventilation device on the roof slope or ridge. It should be noted that all components of the structure must be ventilated. The ventilation device does not pose any particular problems for conventional gable roofs. For roofs with intricate geometry, this task faces certain difficulties, since the free movement of air is impeded by various obstacles: ventilation shafts, chimney, windows and other structural elements.
The next layer is thermal insulation. The main characteristics of the material that affect the quality of the insulation work carried out are thermal conductivity and rigidity. The material must keep its shape, not deform under the influence of environmental conditions.

A vapor barrier layer is laid on the thermal insulation layer, attached to the rafters. A construction membrane film is usually used as a material for its device.
The final stage in roof insulation is finishing the "roofing pie" from the inside. The finished surface should be sheathed with plasterboard or chipboard for further wallpapering or other finishing work.
Roof insulation is an important component of the construction process, which allows you to achieve comfortable living conditions. Competent performance of the work will ensure an increase in the period of flawless operation of the entire roofing structure, eliminating unnecessary repairs.
How to properly insulate the roof of a house
House roof insulation technology. Tips and tricks on how to properly insulate flat and pitched roofs.
How to insulate the roof of a house?
- Features of a pitched roof
- Step-by-step instruction
- Flat roof and the nuances of working with it
Each owner is concerned with the issue of economical consumption of resources for heating a private house. The problem can be partially solved by performing the roof insulation procedure. Thus, it is possible to reduce heat loss by up to 15%. The complexity and result of the work largely depends on how to insulate the roof and what is its design.
If the attic space is not used, then ceiling insulation is a sufficient measure for thermal insulation of the room.
If the attic is not planned to be used, you can limit yourself to insulating the ceiling of the house. The roof itself is insulated if the room under it is used.
Features of a pitched roof

Pitched roof insulation scheme.
Before insulating the roof, it is important to find out exactly how this task is performed in accordance with the type of roof. The pitched roof is insulated from the inside. In an old house, it is imperative to check the crate for the presence of rotten or damp boards. Damaged boards must be replaced with fresh ones, after which all wooden frame elements must be treated with an antiseptic and fire-resistant impregnation.
An insulated roof should be made from several layers. The presence of the following materials is mandatory: waterproofing, insulation layer and vapor barrier. Interior decoration is carried out at will or need. An air cushion should be arranged between the roof and the insulation, and the space should also be between the waterproofing and the insulation. This is necessary for the free removal of the resulting moisture. If you plan to decorate with lining or chipboard, you need to provide an air gap in front of these layers.

Ensuring air circulation when insulating a pitched roof.
Before insulating the roof, to ensure free air circulation between all layers, two holes should be arranged.
How to insulate the roof? To carry out work, which is quite realistic to do on your own, the following materials are required:
- Insulating material directly. The use of mineral wool or glass wool is allowed. The second is produced in slabs or in the form of a roll, however, in order to make an insulated roof, it is optimal to use slabs that do not deform. In addition, foam can also be used.
- Roofing material can be taken as a waterproofing material. A film that protects layers from water, but allows evaporation of the moisture formed inside, is also suitable for this task.
- For vapor barrier, you can choose one of the materials: roofing material, plastic wrap, foil, glassine. The recommended option is a special membrane that protects the insulating layer from water and steam, but allows the resulting condensate to drain out.
After choosing the material for each of the layers and preparing the roof, work can begin.
Step-by-step instruction

Between the boards of the frame, blocks of heat-insulating material cut to the width are laid.
- Measure the distance between the rafters, as well as the thickness of the boards. Next, cut the slabs of the insulating material. Moreover, their width should be 1 cm more than the step between the rafters.
- In the absence of a layer of insulation between the roof and the frame, it must be laid so that it envelops the frame beams. The material is fixed with a stapler. Having laid it around the entire perimeter, you should bring the lower edges under the bevel to organize the water drain. Further, the thermal insulation is laid tightly to the previous layer, without forming voids.
- If there is already insulation under the roof, space should be provided between it and the insulation layer. For this purpose, nails are driven in between the rafters (3-5 cm from the waterproofing). Then a thread is fixed on them, after which the nails are driven in until they stop.
- The insulation material can be fixed with a cord. In this case, nails must be driven in at the edges of the frame.
- The next stage is the installation of insulation. Mineral wool is placed between the boards of the frame, while you need to press it slightly, in the future it will take the desired shape... Polyfoam is located in the cells between the frame elements. If necessary, you can make two layers. When laying the slabs, do not match the joints of adjacent layers. It happens that the thickness of the frame boards is not designed for a double layer of insulation. Additional bars can save the situation.
- Further, as after the previous layer, a thread or cord is pulled over the nails driven into the edges of the rafters. In addition to this method, a fastening in the form of a lathing from rails is used. They are nailed to the rafters with a distance of 30-40 cm.
- The next task is to fix the vapor barrier. The canvas is overlapped by 10 cm. The joints of the layers must be sealed with adhesive tape or tape, and the insulation itself must be fixed with a stapler. It is important to properly fix the vapor barrier at the intersection of the roof and pipe. The service life of the insulating layer depends on how well this area is insulated.
- In conclusion, you need to do the interior decoration of the roof if you plan to organize an attic. Particle boards, drywall or lining are suitable. It is important to maintain an air gap between the insulation and the finishing material. This can be done using not a stapler, but pressed fastening strips.
Flat roof and the nuances of working with it
This design assumes insulation both from the inside and from the outside. Before insulating the roof inside, you should carry out external insulation and check if it is sufficient.
The outer layer is made of mineral wool.
Such material has properties that are indispensable for insulation - it does not burn, it passes steam well, has a low thermal conductivity and serves for a long time.

Thermal insulation scheme for a flat roof.
An alternative material is styrofoam, but it is not good enough in fire resistance.
For external insulation, the following sequence of layers is assumed: a vapor barrier, insulation material, waterproofing and a bulk layer. As waterproofing, you can use any roll material, for example, roofing material, and the bulk layer is made with expanded clay or a mixture of sand and cement.
An important criterion when choosing a material for external insulation is the strength of the supporting structure. Make sure that the frame and floors are capable of supporting the weight of both the roofing material and the insulation. In this case, it is better to use a material that is not heavy in weight - foam or mineral wool.
The execution of work involves the following sequence of actions:
- Cleaning and leveling the roof surface.
- Laying a vapor barrier layer.
- Insulation plates are laid. Fastening is done with glue or mastic, and the seams and joints must be sealed.
- At the end, waterproofing is laid. In this case, it is also worth taking care of the sealing of the seams.
In the case when external insulation of a flat roof is not enough, insulation of the roof should be done from the inside. To do this, wooden strips are screwed to the ceiling with a step of 40 cm. A polystyrene foam board is glued to these strips using mastic or glue. Then the next plate is screwed to the bar, on which the next plate is glued. Upon completion of the overlap of the entire ceiling, a plastic wrap is attached. Further surface finishing can be carried out.
When performing work on roof insulation, it is important to observe safety precautions. With the right approach and following the technology, all work can be done independently.
How to properly insulate the roof of a house: analysis of the entire technology of work from A to Z
How to insulate the roof of a house one day and forget about it for at least 30 years? No repairs, leaks or other problems? This is real! You just need to correctly design a roofing cake, choose an environmentally friendly insulation and do not forget about vapor barrier. And what and how to do, we have revealed in detail in our step-by-step master classes - study and apply, everything is simple!
So, roof insulation in detail!
Stage I. Design
The main factor affecting the performance of the roofing cake and its durability is the humidity regime. Ideally, of course, if there is no moisture in the roofing cake at all - in any form. But in reality it is always there, especially when it comes to a residential building where people breathe, cook and iron.
And how protected the insulation will be in such an environment depends on how competently the roofing cake was designed and how technologically the roof of a residential building was insulated, because there are no such problems with water vapor in the construction of industrial buildings or outbuildings. Just think carefully about what kind of waterproofing you need, what kind of insulation is suitable and how to close it from moisture.
Stage II. Waterproofing
The first step is to get a quality roof waterproofing. So, in the use of conventional waterproofing films and in the installation of a diffuse membrane, the principle is far from the same. The steam released from the insulation settles in the form of condensate and is discharged outside with the help of ventilation air from both insulators, only with the following difference:
- In the event that an ordinary film serves as a waterproofing, vapor accumulates in the form of condensation right on it! Those. in the space between the insulation and the film.
- But when using a superdiffuse membrane, steam condenses in the form of small drops directly on the membrane, but not from the side of the insulation, but from the side of the roofing.
Now, what do you think is better for roofing insulation - so that the drops hang directly over it, or be outside the dense waterproofing? Do not forget also that the air from the forced ventilation is simply taken from the street, and it is humid (for example, during rain).
All this especially applies to fashionable metal roofs. The fact is that metal is a cold material, and condensation forms especially readily for us. And, if you do not carefully think over the ventilation system to evaporate these drops, insulation from the first year of life will cease to fulfill its main functions. In general, the principle is quite simple: a "breathing" waterproofing membrane removes excess moisture from the insulation to its surface and successfully gets rid of it along with the condensate formed under the roof. Here is an example of its installation:

But what cannot be used at all as a waterproofing of a roofing pie of a residential building is glassine, roofing material, simple polyethylene, dense wind protection and advertising banners. And it is best to use modern membranes as waterproofing, which have additional vapor permeability. Such a film additionally removes the accumulated moisture in the insulation upward, thereby maintaining its dry state.
So, the first step to a durable and problem-free roof is a high-quality "smart" vapor barrier, breathable waterproofing that can remove excess vapors from the insulation, thoughtful ventilation. And also such additional systems as a flow guide (special device from Isover) and a roofing system like Paroc Air.
Stage III. Warming
So, at this stage, we select a suitable insulation for the roof of your house.
Mineral wool: a classic of the genre
Here are the main advantages of mineral wool insulation boards:
- Good soundproofing.
- Non-flammability.
- Relatively light weight.
- No deformation even under heavy loads.
- Durability: service life - at least 25 years.
Their installation is also not difficult:

It is especially convenient to insulate the attic floor with mineral wool:

If you have purchased insulation that is too thin, then lay it in several layers, be sure to offset the joints by 20 cm each. It is clear that the more continuous flooring we put the insulation, the less possible cold bridges we will have later.

Basalt wool: high environmental friendliness
Basalt heaters ( separate species mineral wool) for the roof are produced with a thickness of 50-150 cm. Due to their porous structure, they keep heat well, it is difficult to wet them, and even when wet, moisture easily leaves without any damage.
True, basalt slabs are heavy and difficult to work with:

Styrofoam: with extreme caution!
So, polystyrene, or expanded polystyrene, is expanded polyethylene, which is produced in the form of sheets up to 20 cm thick and can be of different density.
No specialist will advise you to insulate the roof of a residential building, especially a wooden one, with polystyrene foam. Indeed, in such a house, if the insulation was done incorrectly, styrene constantly negatively affects the human respiratory tract, blood, causes headaches and other disorders nervous system... For example, in production workshops where blocky foam is packed, many workers complain of a constant dry cough and frequent sore throats. In addition, foam and extruded polystyrene foam begin to melt at a temperature of 80 ° C and thus become toxic.
But at the same time, extruded polystyrene foam is the only type of thermal insulation that is officially recommended in the construction of an inverted roof. All thanks to its resistance to moisture and valuable performance properties.

A good solution in terms of insulation can be the so-called sandwich panel, when mineral wool is placed between two steel sheets. Steam can no longer enter such a structure, and therefore there is no condensation and such a moisture-sensitive insulation retains its properties for a long time.
Backfill insulation: expanded clay, sawdust and foam ball
Backfill insulation is popular to this day, although well-thought-out marketing of mineral wool boards is gradually replacing them. The main advantage of backfill insulation is that it can be mixed with almost any material, and even embedded directly into the structure. The most popular types of backfill insulation:
For a residential building, for example, expanded clay is one of the best options:

Vermiculite is used to insulate the ceiling of the attic. It is a natural stone that is mined for quarries. According to its properties, it is close to expanded clay, and it is also good because it absorbs extraneous odors. For the attic - a significant plus, agree! The foam ball is the individually congealed pores of the expanded polystyrene. It is usually mixed with special solutions.
But how to properly insulate the inside of the roof of the house with ordinary sawdust? They often insulate the floor of a non-residential attic by mixing shavings with cement. Here's a technology like this:
- Step 1. Mix the solution: 10 buckets of sawdust per bucket of cement. You don't need to add a lot of water, the main thing is that the mixture is only slightly moist. So, for dry sawdust take ½ bucket of water, for rotten - only one bucket. First, pour 10 buckets of sawdust into the prepared container, then gradually pour them with water from a watering can and stir all the time. Then pour a bucket of cement into the sawdust and mix everything thoroughly again. In appearance, all this will look like chips smeared in cement, but if you squeeze a little solution into a fist, it should not disintegrate, as well as release water.
- Step 2. Now we lift this mixture into the attic and lay it out by simple tamping with our feet. For insulation, 20 cm of such a layer will be enough.
- Step 3. When the mixture is dry, the screed will be a hard layer that will not bend under your feet - just crunch a little.
And if they are mixed with dry clay and covered between the lags of the attic floor, then there will be no need for a vapor barrier for the roof.
Clay is also suitable as a binder for sawdust:

Ecowool: excellent vapor permeability
The heat capacity of ecowool can be compared with mineral wool, and other indicators are also pleasing:
- Fire safety class A. This material, due to special processing, is classified as hardly flammable. Even in a fire, it does not support combustion and does not negatively affect the roof structure. As a result, with a strong flame from ecowool, just charcoal is obtained, which in turn does not allow the fire and high temperature to spread further.
- The ability to "breathe", maintaining the exchange of air with the environment and withstanding any level of humidity. That is why special vapor barrier membranes are not needed for ecowool.
- Preservation of properties even at high humidity - up to 23.5%, while other heaters in such conditions lose their thermal insulation by almost half.
- Biological stability. Ecowool is not affected by fungi or insects due to special processing with borax.
- Soundproofing qualities. Ecowool is a class 2 sound-absorbing material.
This is how ecowool roof insulation usually looks like:

PU foam: durability and practicality
The main value of polyurethane foam in durability: 1% moisture in polyurethane foam will change the thermal conductivity of this material by less than 10%. And this is not much. Another feature of the structure of PUF is that the cells have a crosslinked molecular structure of the walls, which does not allow molecules larger in size than a water molecule to enter. For comparison, an oxygen molecule is twice as large.
But let's note a couple of points. According to the correct technology, polyurethane foam is not poured into the attic, but sprayed. Here the difference is as significant as putting out a fire or extinguishing a burning object. In addition, direct sunlight is the best PPU is afraid of: for an experiment, you can leave a piece under the sun, covering it only with a sheet of metal, and after a few days you will find only a loose substance.
Just decide first if you need internal insulation, or external:

And the process itself is quite simple. First, the roof is covered from the inside with a 30-cm layer of low-density polyurethane foam covering, only 60-80 kg / m3, and on top - more dense, with a thickness of 5 to 15 mm. The average thickness of both layers is about 8 cm for the snowy Russian regions.
And now about safety: think over the ventilation of the roof so that PPU particles do not enter the living space. Indeed, depending on many factors (temperature, UV rays, humidity), the walls of such cells are gradually embroidered. Usually, all this happens within 15-20 years, while according to world standards, the guaranteed service life of thermal insulation should not be less than 25 years. The sprayed polyurethane foam is formed into cells with a temperature of 80-120C, and when cooled to normal room temperature, the cells with gas are partially discharged (and freon and a little CO2 are used as gas, the thermal conductivity of which is worse than that of air). And over the years the diffusion of air in the PU foam continues.
Stage IV. Vapor barrier
And finally, in no case do not skimp on the vapor barrier of the roofing cake in the house.
Separately, we note that the water vapor pressure directly depends on the air temperature. So, the warmer - the higher the pressure. Have you ever noticed bulging bubbles on someone's bitumen roofing? This is exactly the result of the overpressure that is under the waterproofing. The same applies to insulation in the roofing pie: the more places where moisture accidentally gets in, the worse the vapor barrier used and the higher the air temperature, the worse for the insulation.
And fix the vapor barrier correctly:
- Step 1. Place a paroberrier between the rafters, at least 0.2 mm thick.
- Step 2. Fasten the vapor barrier to the rafters with a construction gun with staples, and seal the joints that we overlap with adhesive tape.
- Step 3. With the same tape, we additionally cover the attachment points with brackets. Necessarily!
Did you do everything as we advised? Now you can sleep soundly!
How to properly insulate the roof of a house: an overview of roof insulation technology
Everything about the correct insulation of the roof of a residential building: the selection of insulation, hydro and vapor barrier, useful tips. Video and photo instructions with detailed analysis all works
The hero of this article, who is also the "artisan in the frame", on whose behalf the story is being told, is Valery Pavlovich Treskov, Candidate of Technical Sciences. He recently retired, having worked for several decades as an assistant professor at the Moscow State University of Civil Engineering. But he is not a construction specialist. His profession is a construction machinery engineer. So insulation for him is an amateur activity. And in this article, he shares his personal experience on the construction of the internal pitched roof.
How it all started
Two years ago we inherited the land and decided to build a house there for year-round use. We chose a project at a firm and ordered her to build a house from.The house was built, and when they began to settle in it, it turned out that it was too small even for a small family. Therefore, they decided to equip the second floor with a bedroom. We studied the instructions of various companies on roof insulation, received an exhaustive consultation at the company's design center and began to think over the insulation project and purchase material.
On the second floor, it was necessary to insulate two gables with windows and both roof slopes, without removing... It is about the work on the slopes that I am going to tell in detail.
The roof in our house consists of unevenly installed (with a pitch of 550-620 mm) rafters with a section of 100x20 mm. Along the rafters there is a crate 80x20 mm with a pitch of 350 mm. It is laid on top of the rafters, and along it -.
Complete roof slope insulation system consists of the following layers (top to bottom):
- crate,
- ventilated gap for removing water vapor from the insulation,
- windproof membrane,
- vapor barrier membrane,
- finishing layer for the interior.
We bought insulation "Light Butts Scandic", windproof and vapor barrier membranes, galvanized nails of different sizes (2x15, 2x30). And the work began.
Ventilation gap device
The first thing that had to be done during installation was ensure a constant ventilation gap between the roofing material and the membrane, which is 20 mm. The easiest way will be to maintain the gap accuracy with rails 20 mm wide, which are nailed on the sides of the rafters close to the crate.This is how the roof slope looked from the inside before the start of the insulation work: 
I sawed the slats from the scraps of boards left over from the construction site. The length turned out to be about 30-60 cm. I inserted 2-3 2x30 nails into each rail so that their sharp ends did not protrude from the back side. And pretty quickly he nailed the slats on the sides of the rafters.

Where the rafters were attached to the uprights, it was impossible to nail the slats. So I:
- detached each post from the rafter,
- shortened by about 45 mm from the lathing parallel to the rafter,
- fixed the rack in its previous position with a clamp and attached it back to the rafter with a screw.


Then I started editing windproof vapor-permeable membrane type A:
- First, I cut out a piece of windproof membrane 50 mm wide more than the distance between the logs and 200 mm high.
- Then he attached the membrane with the same strips to the sides of the lag, and below - to the wall beam. At the top, the membrane has not yet been fixed - it just adhered to the longitudinal bar connecting the lags. This is how I nailed the slats to all the rafters on this side of the roof.
- Then he began to fix the membrane between the rafters... Since the distance between them is different, I measured the width of the canvas each time and cut off 50-60 mm more. He pressed the membrane with the same slats, but reduced the driving step in order to tightly press the membrane to the rafter. I already hammered 3-4 nails into the slats for strength. The edge of the stretched canvas protrudes from the edge of the rail by the same amount.
- Next stage - increasing the width of the rafters... This operation in my case turned out to be forced, because the initial width of the rafters was not enough to lay the required number of thermal insulation plates. I bought boards 140x20 mm, 3 m long, on the building materials market. I cut them in half lengthwise and got boards about 70 mm wide. These boards were attached with screws at the bottom to the rack, and at the top to the ceiling board. Then these boards were additionally secured with wooden overlays: at the bottom of the rafters and in two places between the rack and the ceiling board. This way I increased the width of all the rafters.
Insulation laying stage
This operation had to be done together, since one person could not simultaneously hold all the components of the system. The size of the soft board "Light Butts Scandic" is 600x800 mm.You can choose insulation for your country house on our market. and compare the offers of the largest online stores.
KNAUF Thermal insulation for roofs and walls TEPLOKnauf 50 mm
989 rbl
OBI
ISOBOX Thermal insulation ISOBOX Extralight 100 mm
840 rbl
OBI
MAUNFELD Thermal insulation for attic stairs Lxd 70x120
2 949 rub
OBI
TILERCAT Thermal insulation ISOBOX Extralight 8sht0.288m3 1.2x0.6x50
694 rbl
OBI
We began to insulate the opening with a distance of 600 mm between the rafters. The first slab, half size 600x400, was laid down. And we realized that the most difficult place is the connection of the rafters with the lower logs. A niche appears here, and it seemed very difficult to insulate it and finish it in the future.
So we decided to arrange a ledge with a height of two lining widths- about 180 mm. At this height, the lower longitudinal bar of 50x50 mm must pass to secure the overlapping fourth layer of insulation. Therefore, before laying the insulation layers, boards with a section of 100x20 mm and a length of 350-400 mm were vertically attached to the rafters and logs (180 mm for the lining, 50 mm for fastening to the log, about 120 mm - for fastening to the rafters), in which a triangular socket was previously cut out for bar.

Laying down the second slab of the first layer and holding them, put the second slab 600x800 mm on them. And she was held in place by slats inserted into the gaps between the main and additional rafter boards. This is a fairly simple feasible solution to retain the second layer.

I will dwell on the process in detail fixing the plates.
- Nails 2x20 with large heads were hammered along the rafters, without finishing 2-3 mm to the end. The pitch of the nails is approximately 300 mm. On adjacent rafters, the nails were driven in half a step offset.
- A thin, strong string was tied to the lower nail.
- The first slab of the third layer was laid.
- Gradually removing the slats holding the first two layers of slabs, we laced the slab of the third layer with twine through the nails and fixed it on the extreme nail.

The slabs of the first, second and third layers were laid sequentially and laced up again. And so on to the very top of the opening. This technique made it possible to hold the slabs well in an inclined suspended position.
Then the lacing nails were driven into the board to the cap, and the twine was not removed... Now the surface of the third layer of insulation is ready for laying the fourth layer of insulation, which we had to lay in horizontal rows, overlapping the rafters.

For the installation and fixing of the last, fourth overlapping layer of insulation, we have provided for the fastening of bars with a size of 50x50 mm horizontally to the rafters along the entire length of the second floor.


As a result, we got a surface with straight parallel bars fixed at a constant pitch.
Preparing, laying and fixing the overlapping layer of thermal insulation
- In the center of the bars from the outside, nails were hammered 1.5x20 with a step of 300-400 mm, but not completely, and so that the caps protrude 2-3 mm.
- Nails were hammered on neighboring bars half step offset.
- A string was tied to the extreme nail of the bar and, having laid the slab neatly flush with the bar in the opening (it is 10 mm wider than the opening), we laced the opening with a "snake".
- Having secured the twine, laid the next slab horizontally, secured it with lacing, and so on.
- Then they moved on to the next row, and so on to the very top. The top row is narrow, therefore, having cut off the desired width of the slab, we installed and fixed it as usual.


Membrane assembly
After laying the last layer of insulation, proceeded to installation vapor tight membrane type B... The membrane was fixed on the bars with a stapler and a 10.6x8 staple. They measured the length - the distance between the outer edges of the second and upper bars - and cut off a web 30-40 mm longer from the roll.
The membrane sheet was attached as follows:
- At the beginning, the middle part of the membrane was shot to the bottom bar.
- Then, slightly pulling the canvas, - to the upper, middle and other bars.
- Then, from the central (fixed) line to the right and to the left diagonally up and down, the membrane sections were stretched, straightened and attached to the bars (this is how the wallpaper is straightened when gluing to the wall).
- Further, sagging areas were additionally attached, wrinkles were removed (if they appeared), and as a result, an evenly stretched canvas was obtained, ready for sheathing.

The first canvas is reinforced.

The lining for beauty was attached to the bars with inconspicuous finishing nails 2x60. Since the length of the lining was about 3 m, we decided for reliability to fasten it to the lower, second and upper bars with ordinary galvanized nails 2.5x50.

In the future, they nailed it to the middle bar, removing the sagging of the lining sheet with an ordinary nail (without hammering it to the end).

When upholstery with clapboard, special attention was paid to the first board - it must be strictly in the vertical plane. The rafter board was taken as a basis. It is more convenient to nail the lining together, but it can be done alone. In the latter case:
- I nailed a rail to the ceiling boards at a distance of 30-40 mm from the bar so that the lining sheet could freely pass into the gap.
- At first, he supported the canvas at the top on the rail, and at the bottom on the floor. He inserted the lower part of the canvas with a comb into the groove and, pressing the canvas to the lower bar, pushed it down to the stop into the horizontal lining.
- Then he gently tapped along the edge of the sheet with a hammer to completely connect the sheets and finally nailed the lower part of the lining sheet.
- Then he inserted the comb into the groove along the entire length of the canvas, knocking, tapping on it until all the cracks disappeared.
- Further, pressing the board to the indicated bars, he nailed it to the last.

After hammering in 5-6 canvases, I marked the points of driving the finishing nails (the points should be on the same horizontal line) and hammered the finishing nails at a slight angle so that when the canvas is pressed against the bar, the gap between the linings with the lining decreases. And using the same technology, he nailed the next batch of canvases. We used the same technique to insulate another roof slope.
Other helpful materials